Flexible Solar Panel Electroluminescence Imaging Comparison
Author: Solar 4 RVs
Check out the results of our recent Electroluminescence (EL) imaging session!
At Solar 4 RVs, we regularly perform testing on products that we stock and competitor products to ensure we are always providing the best quality range. This time, we are testing four brand new flexible, lightweight panels using Electroluminescence (EL) imaging.
Here’s a list of panels we’re testing:
Panel 1: Sunman eArc 185W (from our current range)
Using eArc's new square-cut high efficiency mono-PERC cells
Panel 2: A competitors 115W solar panel
At first glance, you’d be forgiven for thinking this panel is a Sunman eArc; visually the lamination pattern looks the same. Where the difference becomes evident is when the panel laminate has an eyelet punched into it; on this solar panel, we can immediately notice the layers begin to separate. This will quickly cause problems when exposed to sun and water and is something that does not occur with the patented Sunman eArc lamination material.
Panel 3: A competitors ETFE 75W solar panel
In general these are considered to be mid-range panels, as ETFE is more expensive than PET.
Panel 4: A competitors shingle cell ETFE 120W solar panel
Shingle cell technology is new, the cells are glued together, it is thought this technology should be more durable as there are no busbar connections that could fail.
But firstly, what is EL imaging?
We know that solar cells convert the light they receive from the sun into Direct Current (DC), but not many of us are aware that when DC is injected into a solar panel it will produce light in a spectrum our eyes cannot see. Fortunately, certain cameras are available that are designed to see the specific spectrum of light the solar panel will produce under these conditions.
Test Results:
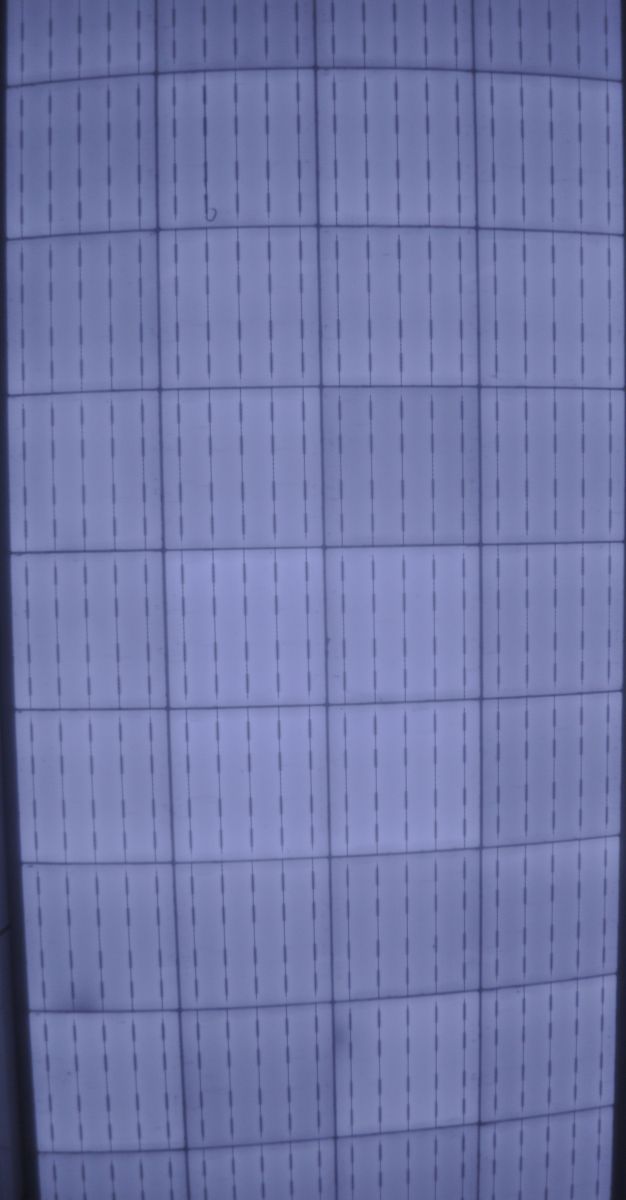
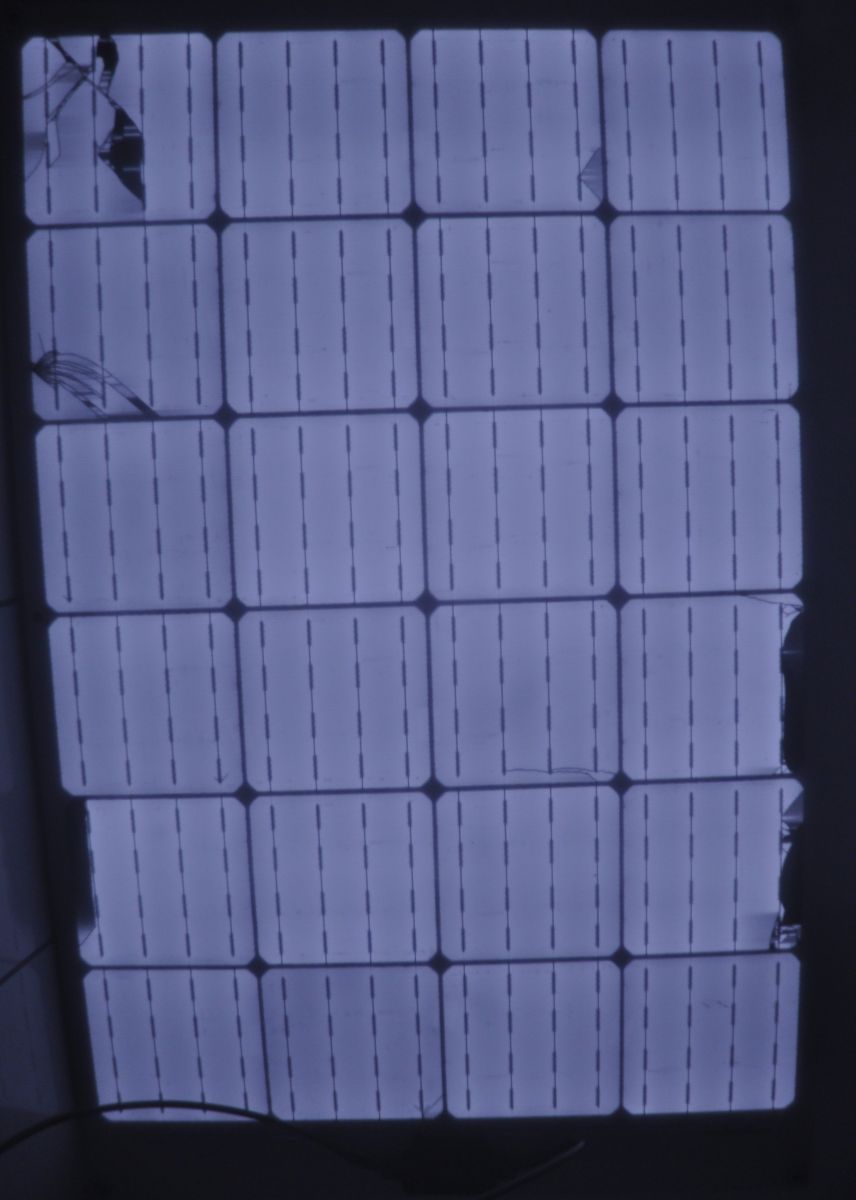
Panel 1: Sunman eArc 185W Panel 2: A 115W solar panel


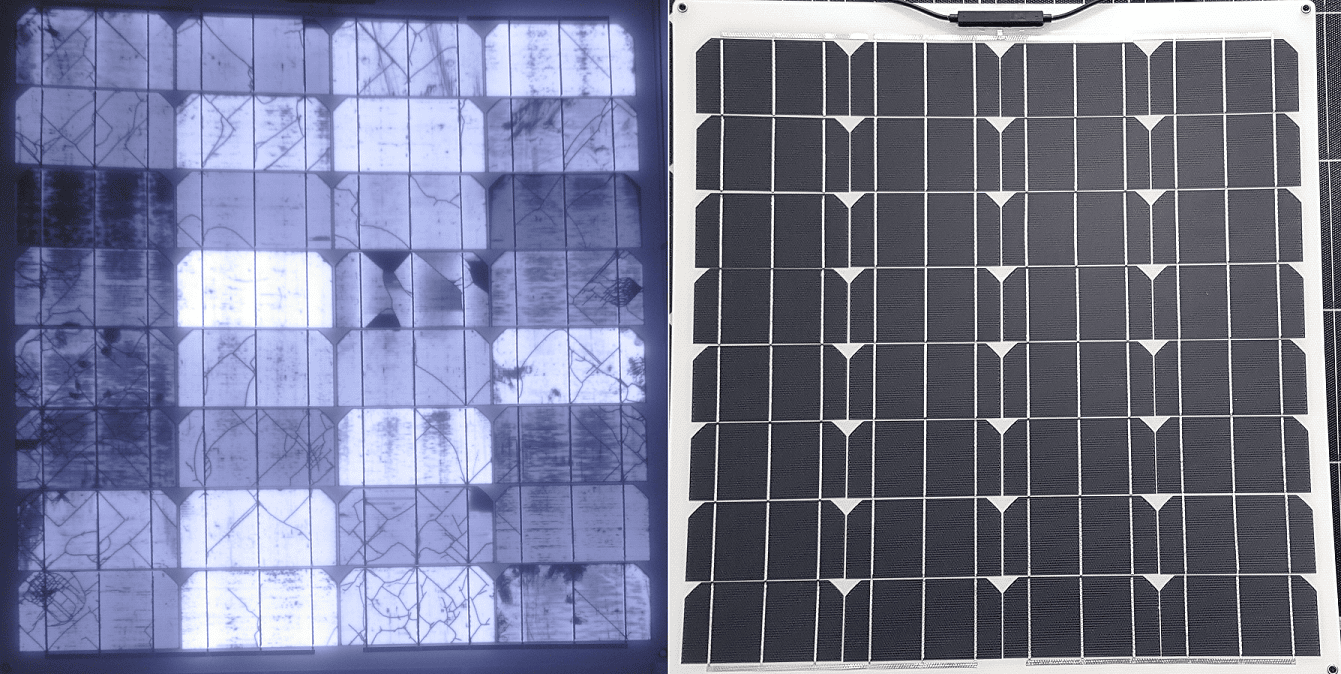
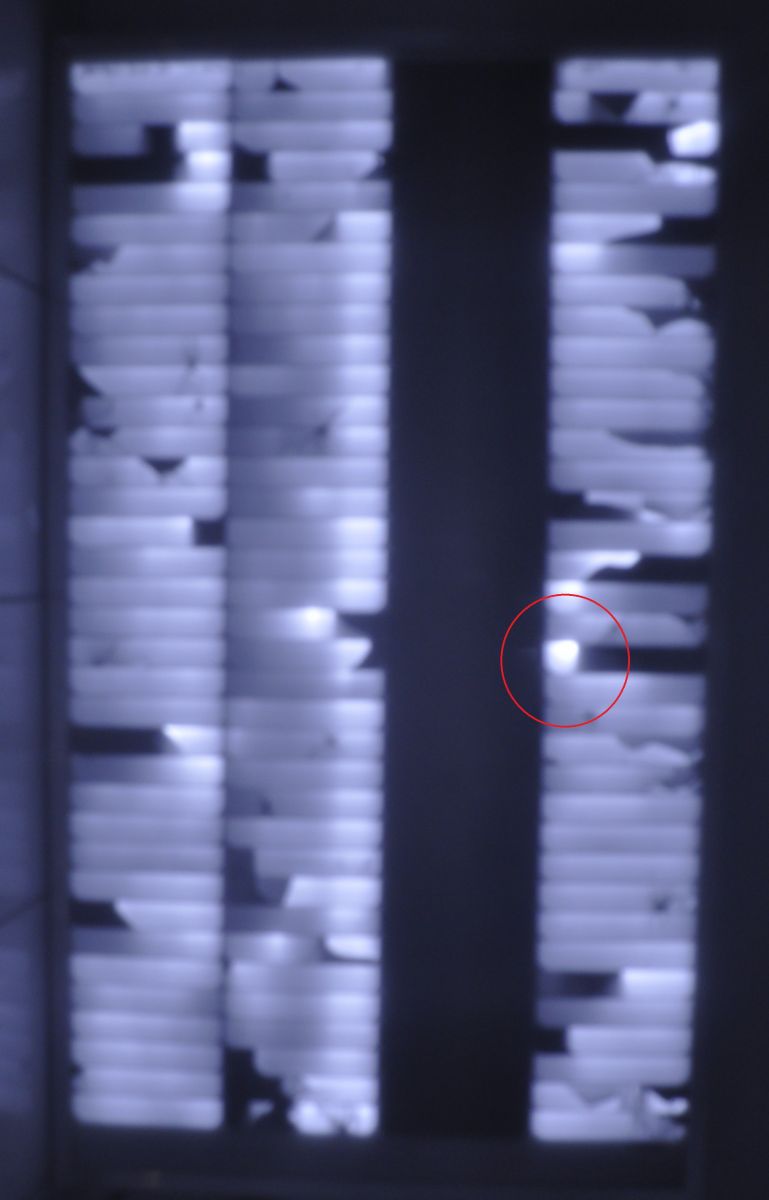
Panel 3: An ETFE 75W solar panel Panel 4: A shingle cell


Why bother doing an EL image?
The examples we have shown reflect the importance. All these panels look perfect to the naked eye, yet from the EL image we can see that three of the four panels have significant defects.
Image 1 This image shows an eArc that has had a vigorous shake test and walked on under controlled conditions and shows no signs of defects. The light is consistent across the panel.
Image 2 Here we can see just how delicate cells are. Some solar cells can be only 100μm thick! Judging by the damage occurring mostly on the edge of the panel, it is likely the cells were damaged when manually handled. All cells are extremely fragile and require a strong lamination to protect them which this panel does not appear to have achieved.
Image 3 The inconsistency in brightness across the cells shows that an irregular grade of cells has been used and there appears to be contamination/corrosion on many of the cells. The cells are also very damaged which is impossible to see without the EL image.
Image 4 In this image you can see a whole row of cells is missing! Noting with all the dark spots, the panel output will be roughly 25% less than its nameplate value. Some of the cells have only a small portion left that are working. These sections are very bright which means that these bright points will likely develop hot spots over time and may burn out and open circuit.
Why are some panels so broken?
Our experience shows the lamination materials have the greatest effect on long-term cell integrity. Looking at the eArc panels, we can see all the cells are a uniform brightness and there are no cracks in the cells. In one of our sample eArc panels, we cracked a cell with a centre punch and a hammer in order to see how the crack would propagate after shaking the panel. After a 30 second rough shake test, we found the crack stayed between the two busbars and did not propagate to the edges of the cells like other solar panels we have tested.
Is EL imaging the only important test?
Unfortunately, no. Cells can produce a good EL image, but still go on to develop hot spots. It is important a good grade of cells is used to avoid hot spots developing over time. Because of this, Solar 4 RVs has a hot spot comparison blog on the way too!
Flash testing is also important to ensure the panel produces the rated output, this test involves placing the panel on a light source of 1000W/m2 at 25C for brief moment, so the panel does not have an opportunity to heat up, and this is the value the panel is rated to. In real world conditions the panel will produce less as the cell temperature would be higher.
Another test is the damp heat testing, where the panel is put into a high temperature and humidity chamber for thousands of hours to ensure the lamination materials will not fail over time.
Summary
We can now see that the physical appearance of the solar panel does not give much indication to the quality of the construction unfortunately. For most applications we recommend using Sunman’s eArc solar panels as not only are these panels highly affordable, and they pass and exceed our expectations on our own in-house testing, they also have third parties such as the Clean Energy Council (CEC) and others certifying their suitability for long term outdoor use.
For commercial/bulk orders, please contact us and we can supply the durability benchmarking studies comparing eArc panels to conventional CEC approved glass solar modules.


